My supply list is such:
old candle jar
that has been burned empty, from home
old holiday candles, $.20 each
pan to boil water, from home
newspaper, from home
skewers, from home
New wick a bit longer than your jar, $2
a metal bowl (that you will never use for food),
thrift store $.50
long (12in) clamps or tweezers, from home
These candles were very cheap now that christmas is over. I paid less than a quarter each for them!
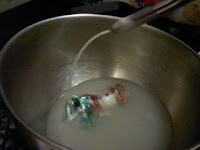
 Begin by filling your pot with water, and put it on the stove on high. immediately put your metal bowl on top and don't touch it ever again (its gets HOT quickly). Place your candle in and wait patiently while it melts... this could take a while.
Now is a good time to talk safety... there is a good website about candle making safety here. The most important thing is that this is hot and messy. Prepare your surface with newspaper, to protect it. Don't do this when you are in a rush, this is a nice slow project. Nor is this the time to start a good movie, or get distracted by something else, and forget. Hot wax is dangerous, and even a fire hazard.

Poor Frosty... looks like winter is coming to an end sooner than expected.
Now use the tongs to fish out the wick, and lay it on the newspaper. be careful not to touch the bowl or wax.
 As it melts you will notice that some candles are colored with pigments and others are covered in foil... as in this little guy. So after the wic kis rescued pull out the pieces of foil. I used 2 candles for this project because I have a large candle glass to fill.
Once the wax is completely melted you have the option of throwing in some crayons to add color if it turns out that the candle underneath is white. But don't mix to many colors up, it will turn mucky brown color.
My kiddo chose pale purple crayon. it was just one crayon that we dropped in.

Now here is where my plan started to get crazy... In theory it would be best to just get a new wick, and use this wick for a smaller candle project, because ideally you want to wrap wick around the skewer and center it in the candle. So at this point... use the new wick instead of trying to prop this wick while it drys.
Be careful when you pour the hot wax, use all the protective gear and such, ensure you are well versed in the safety issues here, and again go slowly. Wax cools and hardens even slower than it melts, so you have time.
I used my extra long clamps to hold the wick, but wrapping a skewer is just as easy. Then leave it all night to rest.


No comments:
Post a Comment